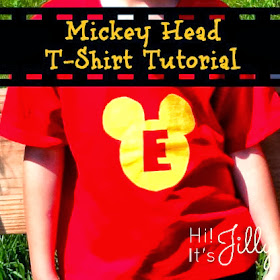
A week or two ago I got the awesomest comment on my Facebook page from a girl named Melissa who used my tutorial to make shirts for her family's Disney cruise!
Her comment totally made my day! It was so neat to see a project someone made from one of my tutorials! And her shirts turned out SO great! I love how she outlined the ears and letters in white. So clever!Melissa asked if I could please post my tutorial here for all of you. But, of course! (said in a French accent)
Here is the original post:
This summer we were able to go to Disneyland with my husband’s parents AND my Mom- Eight people total. It was quite the group, but SO much fun!
I wanted some fun, personalized shirts for us to wear one of the days of our trip. I started looking for different ideas online and saw a lot of great ideas. I finally settled on a
design and decided to do a freezer paper stencil.
I used the free font Mickey Ears, which was so cute and easy. To make the template I just typed the first letter of each person’s name in a Word document, and increased the font size until it filled one whole page.

Then I printed it out, laid freezer paper over it, and traced around it with a pencil. You want to write on the non-shiny side, because the shiny side is the side that you will be ironing to your shirt.

Next, cut out your template with an x-acto knife.

You want to be sure you have enough paper left around the outside of your design so that it doesn’t cause problems when you are trying to paint and when you eventually peel the stencil off your shirt.

Once you have your stencil made, iron the freezer paper to your shirt, shiny side down.

After the shirt cools a little bit, start painting! The kids can even help with this step. You can get fabric paint in a huge variety of colors from your local craft store. Don’t forget to use your coupon and get 40% off!
Oh! And make sure you put a piece of cardboard or a paper bag inside the shirt between the front & back of the shirt. You don’t want to accidently paint the front & back together!!

Now, let the paint dry COMPLETELY!

Once dry, CAREFULLY peel the freezer paper off of the shirt.

(In this picture the bigger part of the stencil has been peeled off, but not the letter in the middle)
And that’s it!! Now you have a one-of-a-kind shirt to wear!!
Here are some other easy crafts that might be right up your alley.


