Showing posts with label Fall in Love With Fall Series 2013. Show all posts

Friday, October 4, 2013

Framed Burlap Pumpkin Tutorial and Fun Fall Decor

Hi! It's Jilly. I FINALLY got my Fall decor up! Yay! I wanted to make this fun little framed burlap pumpin to go along with my fall decorations this year. It was SO easy. Seriously. You can make this!

Framed Burlap Pumpkin Tutorial and Fun Fall Home Decor from Hi! It's Jilly

Let's gather our supplies.


Supplies:
Laminated Burlap Sheets
Picture Frame (I got mine at Dollar Tree)
A pumpkin cookie cutter OR a pumpkin stencil
White paint
paint brush
scissors
pencil

1) Cut a piece of burlap the size of your picture frame. At Wal-Mart I found these sheets of laminated burlap. They are all ready to be painted on, or you can stick them in your printer and print directly on them! I thought that was pretty awesome! You could probably use "normal" burlap, but it might soak up a lot more of the paint.

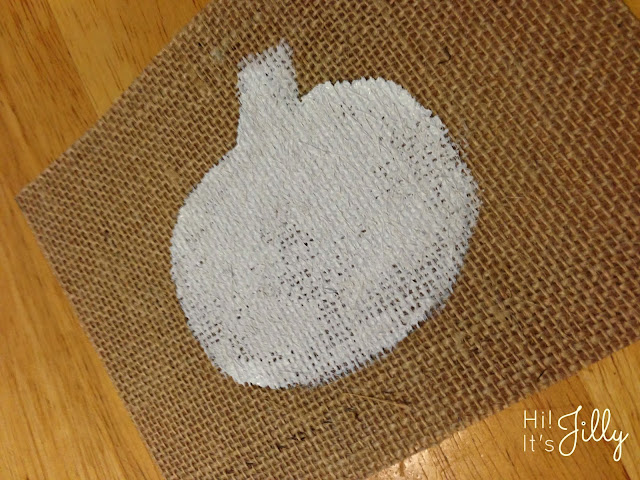
2) Trace your pumpkin shape on to the piece of burlap.

Framed Burlap Pumpkin Tutorial and Fun Fall Home Decor from Hi! It's Jilly

3) Paint inside your pumpkin shape, then let it dry.

Framed Burlap Pumpkin Tutorial and Fun Fall Home Decor from Hi! It's Jilly

4) Put your burlap pumpkin in the picture frame without the glass insert.

5) All done! See, I told you it was easy!

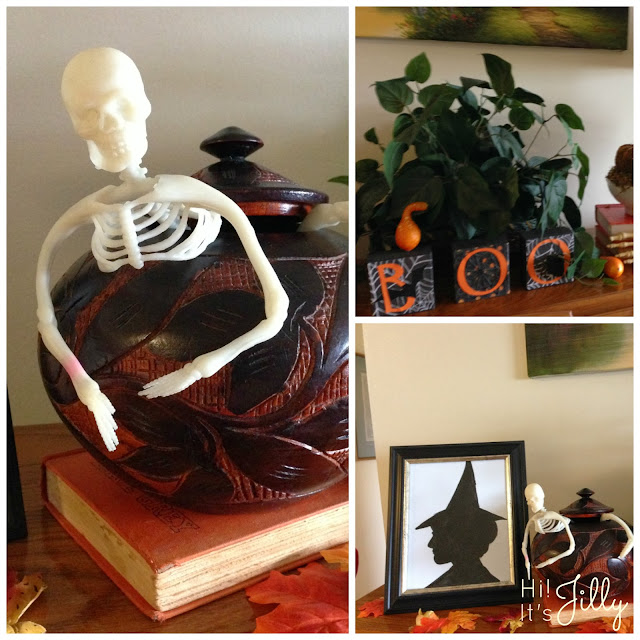
Let's take a peek at the Fall decorations all put together. Aah! I love it. It feels so homey!

Framed Burlap Pumpkin Tutorial and Fun Fall Decor from Hi! It's Jilly

Framed Burlap Pumpkin Tutorial and Fun Fall Home Decor from Hi! It's Jilly


Here's the top of the piano. Michael suggested the skeleton crawling out of the pot. Ha ha!


Framed Burlap Pumpkin Tutorial and Fun Fall Decor from Hi! It's JillyFramed Burlap Pumpkin Tutorial and Fun Fall Decor from Hi! It's Jilly

Do you like decorating for Fall? Done any fun Fall projects or made any yummy Fall recipes? Then be sure to link up with my Fall In Love With Fall link party, open until October 15th. 

And, follow me on Facebook, Twitter, Pinterest, or Instagram to see what crazy thing I post next!

Love to link up with THESE great parties.

Visit thecsiproject.com

Tuesday, October 1, 2013

Fall In Love With Fall Link Up- Let's see those Fall projects!

Hi! It's Jilly. I have LOVED hosting the Fall In Love With Fall Series during the month of September. I've gotten to know so many great bloggers and have seen so many awesome projects and recipes.

Fall In Love With Fall Series full of great Fall projects & recipes on Hi! It's Jilly. #fall #series


Now it's your turn! Have a Fall inspired craft, recipe or project?! Link it up!! I want to see it! The linky will be open through October 15th, giving you plenty of time to add your Fall-ish stuff.

So, link up your Autumn-y posts and tell your friends to link up as well. I want this party to be a great resource full of awesome Fall ideas! I can't wait to see what you all link up!


Monday, September 30, 2013

Caramel Pecan Cream Cheese Pie from Cornerstone Confessions

Hi! It's Jilly. Today's delicious recipe comes from Kathy at Cornerstone Confessions. I love linking up with her Titus 2 Tuesday linky party, so I was giddy when she agreed to participate in the Fall In Love With Fall Series! She's speaking my language with this awesome cheesecake recipe! Let's check it out!

If there is one thing I will break my diet for every time, its cheesecake.  I love me some cheesecake.  But making it can take a lot of time and work.  Thus, I’d often rather take a trip to the Cheesecake Factory to pick up a few of my favorite slices than bake it, which is probably good for my diet because that would require a bit of a travel. 

However, I have recently grown quite fond of this Caramel Pecan Cream Cheese Pie recipe because…

1)  It’s cheesecake!
2) It’s easy and fast to make!
3) It’s virtually a no bake recipe!

Besides all that I really like the caramel pecan topping.  It reminds me so much of fall and the picking of pecans in my parent’s backyard.  All that to say, if you love pecans and you love cheesecake, then this recipe is for you, but be forewarned–you may have trouble stopping with just one piece.  Enjoy!

Caramel Pecan Cheese Pie from Cornerstone Confessions. Part of the Fall In Love With Fall Series at Hi! It's Jilly. #recipe #fall #dessert

Caramel Pecan Cream Cheese Pie

1/4 c. pecans, chopped
1/8 c. flaked coconut
1 tbsp. butter, melted
8 oz. cream cheese, softened
½ c. confectioner’s sugar
8 oz. Cool Whip
1 graham cracker crust
Caramel Ice Cream Topping

In a small bowl combine the pecans, coconut, and butter. Pour into a small baking dish.  Bake at 375 degrees for 5 to 10 minutes or until golden, stirring occasionally.  Cool.
In a separate bowl, beat cream cheese and sugar until smooth.  Fold in Cool Whip.  Pour cream cheese mixture into graham cracker crust.  Sprinkle with coconut mixture.
Refrigerate 2 hours.  Drizzle with caramel just before serving.  Serves 8.

Kathy GossenKathy Gossen is a developing domestic diva drawing on the divine who writes about her domestic adventures on Cornerstone Confessions.  She’s a child of God, a wife, a homeschool mom of two, a daughter, a friend, a sister, an undercover organizer, a musician and an aspiring techie who is learning what it means to apply God’s Word in the everyday.  She prays her life song sings of her love for her Lord and hopes to encourage others along the way.

Oh man! That looks so fancy, and so easy to make! Thanks for sharing your recipe with us!

What a wonderful end to our Fall In Love With Fall Series! I loved it so much, and appreciate all the awesome bloggers who contributed! To catch all the posts in the series, click that cute little button below! Tomorrow I will be posting a link party where you can link up YOUR favorite Fall projects and recipes!
Fall In Love With Fall Series full of great Fall projects & recipes on Hi! It's Jilly. #fall #series

To see what's up next on Hi! It's Jilly, sign up for my free newsletter, or follow along on Facebook or Twitter. You can always catch me hanging out on Pinterest, too. 

Friday, September 27, 2013

Pumpkin Spice Latte from Kelsey at Poofy Cheeks.

Hi! It's Jilly. Today we have the sweet Kelsey from Poofy Cheeks visiting us and sharing a yummy, Fall-licious recipe! Let's dig in, shall we?

Hey! I’m Kelsey and I am visiting from Poofy Cheeks. I am so excited to be guest posting here on Hi! It’s Jilly with a Pumpkin Spice Latte recipe! A few weeks ago I had my first latte and I have been hooked ever since! As I watch everyone delighting in the fall weather I admit I am a little jealous. I live in Florida and it is still pretty hot here! I decided to take the lattes I have been enjoying the past few weeks and put a fall twist on it by creating a rich and buttery pumpkin spice latte. The smell, the taste and even the color are enough to make me think it is fall outdoors too!

Pumpkni Spice Latte from Poofy Cheeks. Part of the Fall In Love With Fall Series at Hi! It's Jilly. #pumpkin #latte #fall #recipe

For this recipe you will need:
  • 2 tablespoons of butter
  • 2 tablespoons brown sugar
  • 1/2 cup brewed coffee
  • 1 cup of whole or 2% milk
  • dash of pumpkin spice
  • 1 teaspoon of imitation butter extract (vanilla will work too)
Directions:
In a saucepan stir the butter and brown sugar over medium heat until it starts to bubble. Add in the remaining ingredients and stir until heated through. Top with another dash of pumpkin spice.

Pumpkni Spice Latte from Poofy Cheeks. Part of the Fall In Love With Fall Series at Hi! It's Jilly. #pumpkin #latte #fall #recipe


Pumpkni Spice Latte from Poofy Cheeks. Part of the Fall In Love With Fall Series at Hi! It's Jilly. #pumpkin #latte #fall #recipe

When my boys get home from school today we are going to be creating our fall bucket list – what is on your fall bucket list this year? Drinking a pumpkin spice latte? ;)

That sounds great! I'm not a coffee drinker myself, but I bet that combo would be great added to some hot chocolate! Mmmmm... Gotta try it now!

I've really been enjoying our Fall In Love With Fall Series, and I hope you have been, too! Check out the rest of the series by clicking on the button! 


Fall In Love With Fall Series - full of great Fall projects & recipes on Hi! It's Jilly. #fall #series


OH!! I almost forgot to tell you! On October 1st (next Tuesday!! Eek!) I will be hosting a linky party to celebrate the end of our series! You can share all your fabulous Fall-inspired projects, recipes, fashion...anything Fall-ish you want! So, you'll definitely want to check that out!

Follow along on Facebook, Twitter, or Pinterest so you don't miss it! 

Add your e-mail address here to subscribe to my newsletter. :)

Wednesday, September 25, 2013

Fall Fashion with Tara & Devin from Salt & Pepper Moms

Hi! It's Jilly. Another one of my favorite things about Fall is the cool crispness in the air. Today the lovely ladies from Salt & Pepper Moms are here giving us some Fall fashion tips. It's a good thing, 'cause I need all the fashion tips I can get! 


We could not be more excited for Fall. Cooler weather, pumpkin-flavored treats, hot cocoa, Halloween fun, and of course... the switch to our warmer wardrobes. After a long hot summer here in AZ, we are always ready to break out our scarves and boots and sweaters and hats as soon as the weather becomes crisp. Unfortunately for us, that sometimes doesn't hit until early November. Although our temps aren't there yet, we are READY! So here's a look at some our favorite things we are looking forward to wearing soon!


Devin took a summer tunic she recently found on clearance at Target and gave it a Fall look. By adding a long sleeved shirt, leggings, and boots, it makes a quick transition into a bright and fun Fall outfit. Cooler weather doesn't always mean we have to stow away our summer pieces and brightly colored clothes. Have fun mixing it up!


What Devin Wore:

 Coral Tunic - Target (Clearance)
Leggings & Boots - Gift
White Shirt - Kohl's
Hat - Target
Turqoise Necklace - JC Penney
Belt - Inherited from Grandmother


Tara decided to show a more casual look for Fall. The sweater she wore was a gift from her mother-in-law, and layered it over her chambray shirt. Pair that with some dark denim jeans and nice boots and you are good to go!


What Tara Wore:
Chambray Top: H&M
Sweater: Gift
Necklace: Charming Charlies 
Jeans: Decree (Buckle)
Boots: Gift

Great outfits! Thank you so much for sharing them with us, Devin and Tara! You've definitely given me some great ideas. I have a soft spot in my heart for Arizona, and I am jealous of your weather there! 

Catch the beginning of our Fall In Love With Fall series by clicking below.

Fall In Love With Fall Series full of great Fall projects & recipes on Hi! It's Jilly. #fall #series

And, make sure you sign up for my newsletter, or follow me on Facebook, Twitter, or Pinterest, so you don't miss the rest of the series!

Monday, September 23, 2013

FREE Fall embroidery pattern from Jenna at Call Her Happy!

Hi! It's Jilly. I am soooo excited about today's post from my bloggy friend Jenna at Call Her Happy! It's the perfect Fall project! Let's see this sweet craft!

You know what makes embroidery the perfect craft for a busy mom? You can pick it up and put it down whenever you need to, and you don't have to worry about remembering where you left off or how to start back up again.

And, it's an even more perfect craft for Fall because is there anything cozier than snuggling on the couch, watching late season baseball, drinking a vente-decaf-skinny-sugar-free-vanilla-latte and doing a little stitching? I can tell you from present experience, there is not.

So, if your crafty soul needs a little love, pick up a few supplies and check out this free pattern I whipped up just for Hi! It's Jilly! readers.

FREE Fall Leaves embroidery pattern by Call Her Happy. Part of the Fall In Love With Fall Series at Hi! It's Jilly. 

Fun Tip: Color in the leaves with a colored pencil to add a fun pop of color to your project.

Print the free pattern below by saving the image to your computer first.
Free Fall Leaves embroidery pattern by Call Her Happy. Part of the Fall In Love With Fall Series at Hi! It's Jilly.


And, once you stitch it, share your pictures with us on Instagram: @callherhappy and @hi_its_jilly.

Have a crunchy Fall!

Jenna! This pattern is seriously so cute! I can't wait to run to the craft store and get the supplies I need to make this! You are right...it's a perfect Fall craft for busy moms! Thank you for the free pattern!

I love Jenna's idea of showing us your finished projects on Instagram. I look forward to seeing your beautiful embroidery! 

See all the other great projects and recipes in the Fall In Love With Fall Series  and click the button!


To catch all the upcoming posts (and there are many more great ones on their way), subscribe to my newsletter, or follow on Facebook, Pinterest, or Twitter!

Friday, September 20, 2013

5 Fabulous Fall Soups

Hi! It's Jilly. The cooler weather that accompanies Fall makes me want to curl up with some hot chocolate, a bowl of soup, and a good movie.

I'm totally a dork...I love Harry Potter! I always have to watch several of the movies when the weather cools off. I think it's because each movie starts in September.

ANYway, back to business...SOUP! I love making soup in the Fall. Here I've rounded up 5 Fabulous Fall Soup recipes. I hope you enjoy them!


To catch the rest of the Fall In Love With Fall Series, click below! 

Fall In Love With Fall Series full of great Fall projects & recipes on Hi! It's Jilly. #fall #series

Follow me on Facebook or Twitter, or subscribe to my newsletter, so you don't miss the next post!

Wednesday, September 18, 2013

Pumpkin Spice Bars from Alyssa at Kadydid Designs

Hi! It's Jilly. I'm super pumped to have my friend IN REAL LIFE Alyssa guest posting today. Everything in her Etsy shop is darling, and everything she makes is yummy! Happy to have this recipe of hers for my own personal use now. Mwahahahaha! Enjoy!

Hi! My name is Alyssa, and I blog over at Kadydid Designs. I blog about just about everything; recipes, DIY projects, regular mommy-hood and a bit about my Etsy shop. I've known Jillian for quite awhile (we became friends while her sweet family was living in Phoenix) and I am so excited to be sharing one of my favorite things about fall on her blog today.

One of my all time favorite treats to make in the fall is Pumpkin Spice Bars.  I love using fresh pumpkin in them, and I end up making them way more than I should.  But - it's fall, right?  You've got to soak up all the pumpkin deliciousness while you can! (If you've never tried roasting your own pumpkins before, here's a quick "tutorial")


Pumpkin Spice Bars
Pumpkin Spice Bars by Kadydid Designs. Part of the Fall In Love With Fall Series on Hi! It's Jilly. #fall #pumpkin #recipe


Preheat oven to 350.  Line a 11x15" pan with foil.

Mix together:

2 c. crushed graham crackers or gingersnap crumbs
7 T. melted butter
1/4 c. sugar

Spread mixture into baking pan and flatten/smooth out to make an even crust.
(**Side note: I have used 1 1/2 c. graham cracker crumbs, and it still works.  So if you have little hands at your house that steal graham crackers like I have at mine, you'll be fine.  Also.  7 tablespoons of butter is 1 tablespoon short of one stick, so I generally just use an entire stick of butter)

Bake for approximately 6 minutes; or until fragrant.  Cool completely.

Then, mix together:

2 c. flour
2 tsp. cinnamon
1 2/3 c. sugar
2 tsp. baking powder
1 tsp. baking soda
1 tsp. salt

Add:

4 eggs
1 can (15oz) pumpkin puree
1 c. vegetable oil

Pour on top of graham cracker crust and bake at 350 for 25-30 minutes.  Cool completely and frost with your favorite homemade OR store bought cream cheese frosting.  Feel free to sprinkle with any fall/Halloween sprinkles, or just leave plain.

These are delicious and perfect to take to any gathering this fall!!

Thank you for sharing this awesome recipe, Alyssa! It looks so easy to throw together, and I bet it makes your house smell amazing! 

To see more of our Fall In Love With Fall Series, click the button below! 


Fall In Love With Fall Series on Hi! It's Jilly. #fall #series


Friday, September 13, 2013

The Paper Lunch Bag Wreath from Kim at Bugaboo, Mini, Mr, and Me.

Hi! It's Jilly. Our contributor today is a friend of mine from High School! Now we're all grown up and have blogs of our own! Well, "grown up" is all relative, right?! I can't wait for you to meet Kim and see the cute wreath she's whipped up for us!

Hi!  I'm Kimberly - the "me" over at bugaboo, mini, mr and me.  My blog is a peek into all my creative endeavors - successes and failures! - and includes a little of everything: creating with kids, lots of different crafts, sewing, baking and cooking, some DIY/power tool type stuff, a little photography, and writing.  I'm really excited to be here guest posting - and especially excited for the theme because it gave me a chance to make a little door decor, which I haven't done in a long time.

I used to think that making wreaths was something old ladies did with plastic flowers and weird wicker baskets and such.  I had zero interest in that type of "crafting."  Once I started my blog and was looking for new ways to be unique and creative with my crafting, I realized you can make a wreath out of just about anything... And they've been some of my favorite creations ever since!

Today, I'm going to show you how to make:

The Paper Lunch Bag Wreath from Kim at Bugaboo, Mini, Mr, and Me. Part of the Fall In Love With Fall Series at Hi! It's Jilly

Which, ironically, includes some fake floral stuff.  Ha!

The Paper Lunch Bag Wreath from Kim at Bugaboo, Mini, Mr, and Me. Part of the Fall In Love With Fall Series at Hi! It's Jilly

So, let's get started!  Gather all your supplies!  You can make the basic Paper Lunch Bag Wreath with the items below:

The Paper Lunch Bag Wreath from Kim at Bugaboo, Mini, Mr, and Me. Part of the Fall In Love With Fall Series at Hi! It's Jilly

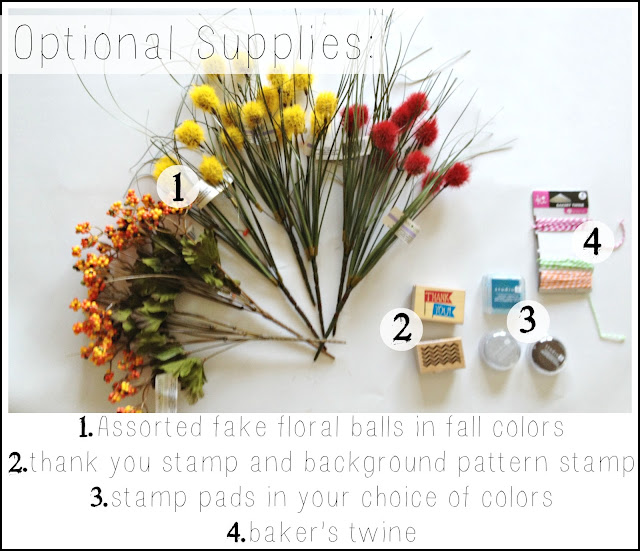
And you can make the "supreme" version (the one pictured) with the additional optional supplies:

The Paper Lunch Bag Wreath from Kim at Bugaboo, Mini, Mr, and Me. Part of the Fall In Love With Fall Series at Hi! It's Jilly


A note about supplies.  One thing I try hard to do is keep my crafting affordable.  We're all on a budget right?  So my number one tip for wreaths is to check out your local thrift stores for wreath forms.  My local store usually has styrofoam and straw wreath forms regularly and they are $0.75!!  Which is awesome compared to like $12 at Michael's.  

For this specific wreath, my form is a 10 inch squared edge form (but you can totally use any kind of foam form) that I got at the thrift store.  I got "giant" paper lunch bags at Walmart for just over a dollar for a 300 pack (they are slightly larger than normal lunch bags).  I found the crepe paper leaves at the dollar store.  They came in packs according to color, so if you want a multi-colored wreath like the one pictured, you'll have to get more than one pack.  I got four, each pack has 10 leaves.  I have a ton left over for a different craft now!  The floral ball shaped thingies are from the dollar store as well.  The stamps came from JoAnn's in their $0.99 bins, and the mini stamp pads and the twine came from Walmart in their $1.00 craft bins.  SO.  There's your shopping list, in case you needed some ideas...


Prepare your bags:


The Paper Lunch Bag Wreath from Kim at Bugaboo, Mini, Mr, and Me. Part of the Fall In Love With Fall Series at Hi! It's Jilly
1.  Keeping the bag flat, use your scissors to cut across the top (where it's all jaggedy) and to cut the bottom off.

2.  Slice the bag open down the middle seam on the back.

3.  If you opened it up now, it would look like this.

4.  Fold it all up on the folds and then fold it in half.

5.  Cut it in three (somewhat) equal pieces.

6.  Take each piece, open them up and then crumple them.


I needed three bags to cover my wreath form (9 strips), you may need a few more or less depending on the size of your form and how crumply you keep your strips when applying them.


Wrap the wreath:


The Paper Lunch Bag Wreath from Kim at Bugaboo, Mini, Mr, and Me. Part of the Fall In Love With Fall Series at Hi! It's Jilly

1.  Begin with your naked wreath form.  Pick which side is the back and lay it backside up.
2.  Put some hot glue right on the form.
3.  Straighten out one of your paper bag strips slightly (leaving some of the folds and wrinkles as is) and smoosh it down into the hot glue.
4.  Wrap it around the front of the wreath, then tuck it under to the back.  When you are wrapping, make sure to overlap the paper a little and also keep it rumply. 
5.  When you run out of strip, add a line of hot glue along the end.
6.  Push the paper strip down onto the wreath form.
7.  Now, take a new strip and add a line of hot glue to one end.
8.  Smoosh it down onto the wreath, overlapping the end of the last strip.  Place it at a slight angle to help it lay flatter as you wrap.
9.  Wrap and wrap until you run out.
10.  Hot glue the end down.
11.  Continue adding strips with hot glue, overlapping, crumpling and sometimes twisting and smooshing a bit, until the form is completely wrapped.

Adding leaves:
The Paper Lunch Bag Wreath from Kim at Bugaboo, Mini, Mr, and Me. Part of the Fall In Love With Fall Series at Hi! It's Jilly

1.  Begin with your wrapped wreath form.  Again, you'll need to decide which is the front and which is the back.
2.  Pick a leaf to start, put a little hot glue on the back.
3.  Press it down onto the wreath, anywhere.  Hold it there for a moment.
4.  Voila!  A leaf!  Pull up the edges a bit.
5.  The best part about these leaves is that they have wires for veins.  So before you add them to the wreath, crumple them up a bit.  Bend them and shape the edges.  Most fall leaves aren't perfectly flat, are they?
6.  Plus, you can curl the stem, which looks cooler than a long straight lame stem.
7.  Put some hot glue on the back.
8.  And add it to the wreath right next to the previous leaf.
9.  You will want to overlap your leaves.  Place them at different angles and in different spots along the wreath.  Bend them into each other.  Continue adding them and filling in holes until the leaves cover a little less than half of the form.

And you could totally stop here!  This would make a perfectly pretty fall wreath for your door.  Just:

10. Tie a piece of twine in a loop.  Place the loop under the wreath form.
11.  Pull one end of the loop through the other end and tighten.  Add a dab of hot glue to keep it in place.

And then you can hang it!

But, you could also keep going.

Adding more pizazz:
The Paper Lunch Bag Wreath from Kim at Bugaboo, Mini, Mr, and Me. Part of the Fall In Love With Fall Series at Hi! It's Jilly
1.  Take the little plastic balls and pull them off of the large stem so they are single stemmed and smaller, but still in little bunches.
2.  Add hot glue along the stem.
3.  Poke it down under a leaf.
4.  I places mine at the intersections of leaves - where they overlapped - to hide the glue-y stems.
5.  I also made them more concentrated at the bottom of the wreath, and more sparse toward the top.

Again, you could stop here!  Another perfectly pretty wreath for your door!

BUT.  What about just a leeeeettle more?

Adding even more pizazz:

The Paper Lunch Bag Wreath from Kim at Bugaboo, Mini, Mr, and Me. Part of the Fall In Love With Fall Series at Hi! It's Jilly
1.  Cut your fuzzy ball flowers apart, leaving stems on each one.
2.  Separate them into three piles, one for each color, and then a third pile for a mix of the two colors.  Fan one of the piles out and shape it until you like it, place it on top of a scrap strip of paper bag, squirt hot glue on the stems and wrap the bag around the stems.  This will keep the flowers together how you want them and hide the stems.
3.  Trim the ends of the stems and attach the flowers to the bottom of the wreath (just barely overlapping the leaves) by hot gluing the paper wrapped part down.  Repeat steps 2 and 3 for the mixed color pile.
4.  Pull a few balls off of the last pile of flowers.  Then repeat steps 2 and 3 again.
5.  Once you've glued the paper wrapped stems down to the wreath, hot glue the single balls into any holes of empty spots.
6.  Cut a small section of scrap paper bag and glue it over the last stems sticking out to hide them.

And then you could stop.

But if you're like me, you don't know when to stop.  So why not shnazz it up some more?

Add a banner:
The Paper Lunch Bag Wreath from Kim at Bugaboo, Mini, Mr, and Me. Part of the Fall In Love With Fall Series at Hi! It's Jilly

1.  Cut a piece of twine to fit across the inside of the wreath, with a little extra wiggle room to glue.

2.  Fold a piece of scrap paper bag in half and cut out three triangles and a rectangle.

3.  Use your "background pattern stamp" and a neutral color stamp pad to stamp a background on the pieces.  Mine is brown chevron.

4.  You can use whatever kind of quote or phrase you want for the rectangle piece, I went with Thank You, for a Thanksgiving-y theme.  I used a bright contrasting turquoise so it would stand out.

5.  Open up your triangle, lay a line of hot glue down the middle.

6.  Lay your twine across the inside, making sure the paper piece is where it needs to be, 

7.  and smoosh the triangle closed around the twine.

8.  Repeat this for the other two triangles and the rectangle.

9.  Turn your wreath over and glue the ends of the twine down to the wreath.

10.  To hide the glue spots and make the twine extra secure, glue down a small square of paper bag over each end.

11.  Turn your wreath over.  Done!

And because there's likely no more trends you could possibly add at this point without making it seem completely over the top, you're finished!


The Paper Lunch Bag Wreath from Kim at Bugaboo, Mini, Mr, and Me. Part of the Fall In Love With Fall Series at Hi! It's Jilly


Just hang proudly on your front door and enjoy along with the nice cool fall weather!


The Paper Lunch Bag Wreath from Kim at Bugaboo, Mini, Mr, and Me. Part of the Fall In Love With Fall Series at Hi! It's Jilly


It's my favorite season - I think because of the colors.  I love that this wreath illustrates that.

You might also like some of my other fall-inspired wreaths!  Like: 


OR, my "flavors of fall - dessert edition" which includes recipes for five different yummy fall desserts!


Thanks for asking me over, Jillian!  Hope to see you all at my blog, or you can find me on facebook and pinterest!

Okay, how cute is that wreath?! Must. make. one. now. Thanks for the shopping tips, too. I never would have thought about getting wreaths from the thrift store!

To check out the rest of our Fall In Love With Fall Series, click that little button below. So you don't miss the rest of the series, follow me on FacebookTwitter, or Pinterest, or sign up for my newsletter and get each new post straight to your inbox!


Fall In Love With Fall Series full of great Fall projects & recipes on Hi! It's Jilly. #fall #series

Tuesday, September 10, 2013

7 Amazingly Delicious Hot Chocolate Recipes

Hi! It's Jilly. I loooove hot chocolate. Seriously. Nothing says Fall like a big 'ole mug of the stuff. My Hubby likes to spoil me by bringing me different kinds he finds at work or the store. Any kind of hot chocolate is great, but I've gathered a list of seven deadly sins  hot chocolate recipes for your enjoyment.

Proceed with caution, my friends, and don't burn your tongue!

Gingerbread Hot Chocolate Recipe

Gingerbread Hot Chocolate from Coastal Living


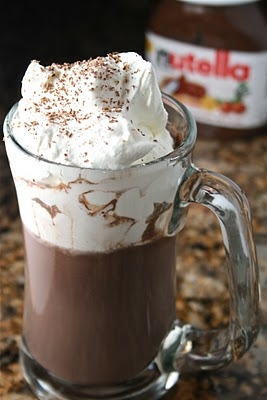
Nutella Hot Chocolate from The Hungry Housewife


hot chocolate floats {taste this} at shaken together

Hot Chocolate Floats from Shaken Together


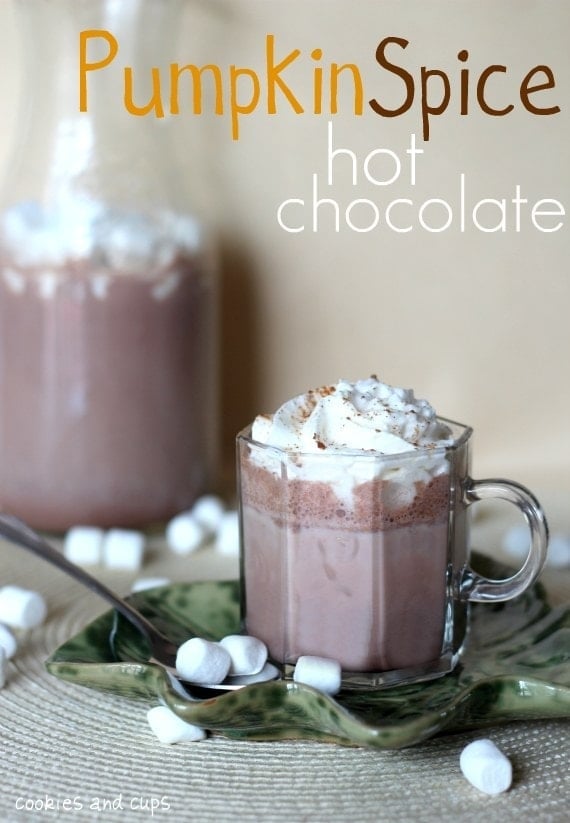
Pumpkin Spice Hot Chocolate from Cookies & Cups


Frozen Hot Chocolate, a la Serendipity, found at Tasty Kitchen


Oreo Cookie Hot Chocolate from SEWlicious Home Decor

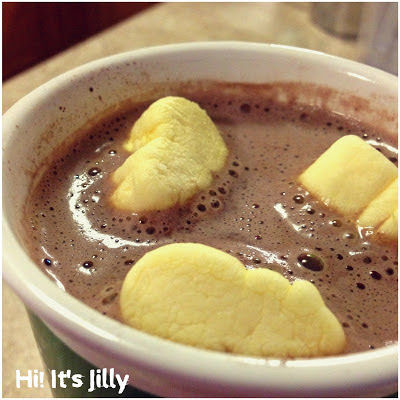
Better Than Starbucks Salted Caramel Hot Chocolate from Hi! It's Jilly

Better Than Starbucks Salted Caramel Hot Chocolate

There you go. Seven amazingly delicious hot chocolate recipes. Now go get your "hot chocolate" on! 

**Like this post? Then please "pin" it on Pinterest, or share it on Facebook, Twitter, or Google+**

Are you following me on FacebookGoogle+PinterestTwitterInstagram, or Bloglovin' yet?!


LinkWithin

Related Posts Plugin for WordPress, Blogger...